The "Scene" template offers you the option of displaying larger landscape format graphics. Users can navigate freely in the scene. You can display information hotspots on the scene graphics or link to other scene backgrounds.
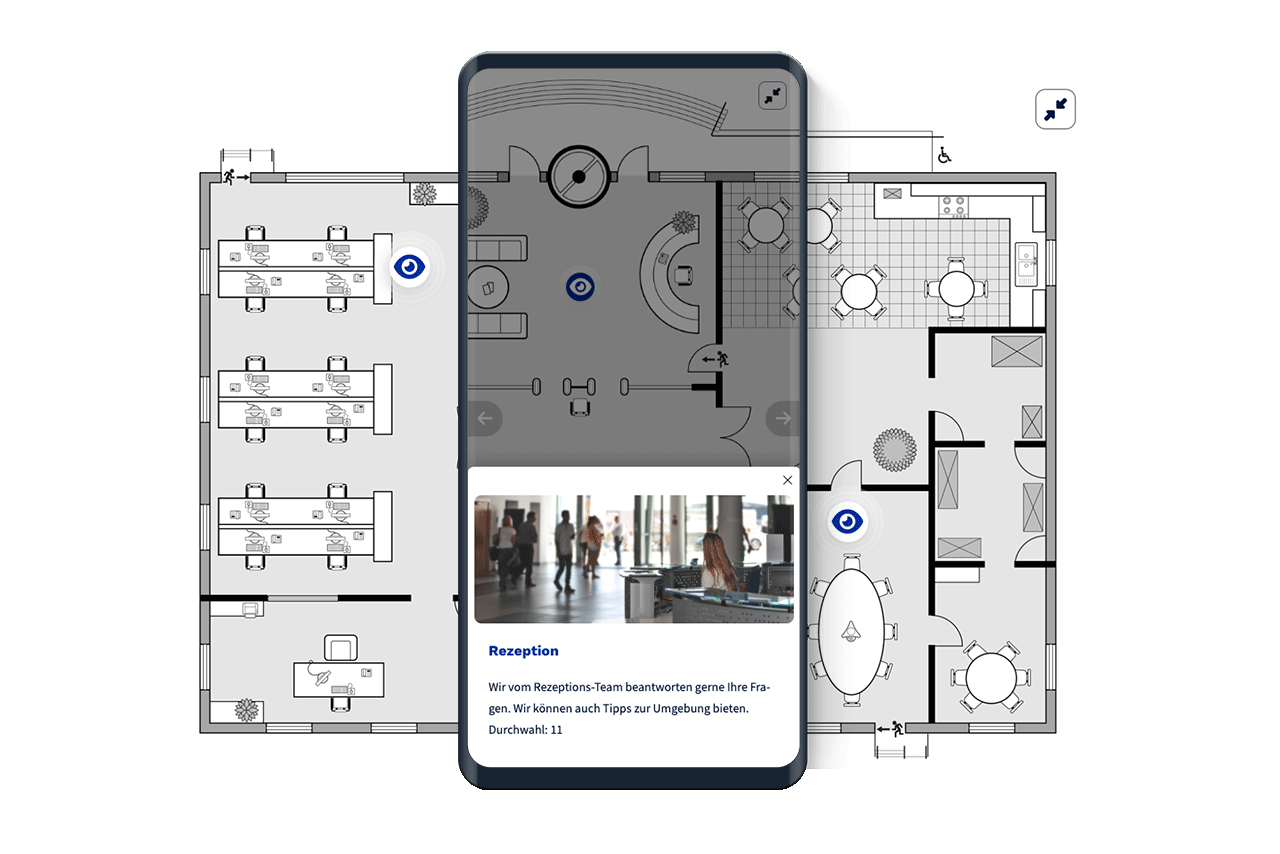
Concrete use cases for scene maps are, for example:
Larger infographics with hotspots for more details
A virtual tour of the office, for example
Software instructions with hotspots for navigation and explanations
Hotspots can consist of an info box with an image, audio or text, play only an audio file or navigate to a different background.
To create a scene card, add a card with the template Scene to a deck.
After creating the scene map, you will be taken to the map editor. Give the map a name to save it later. Below this, you can upload and add a preview image. The preview image is displayed when the scene card is reached in the deck. The scene is then displayed in full-screen view. In the preview of the card on the right-hand side, you can already see the preview image and the button to open the scene.
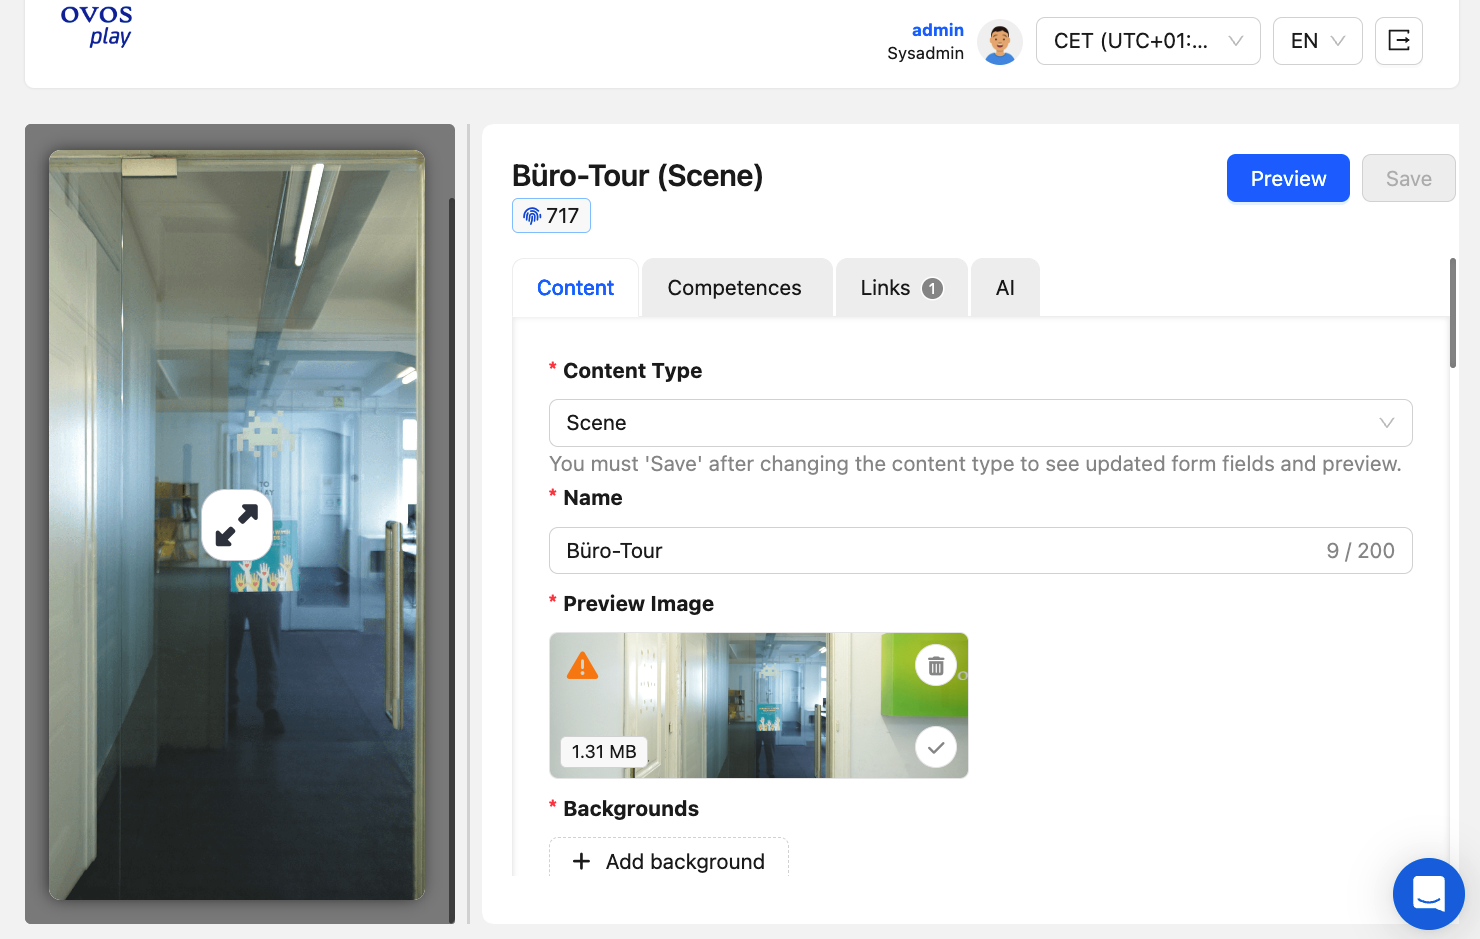
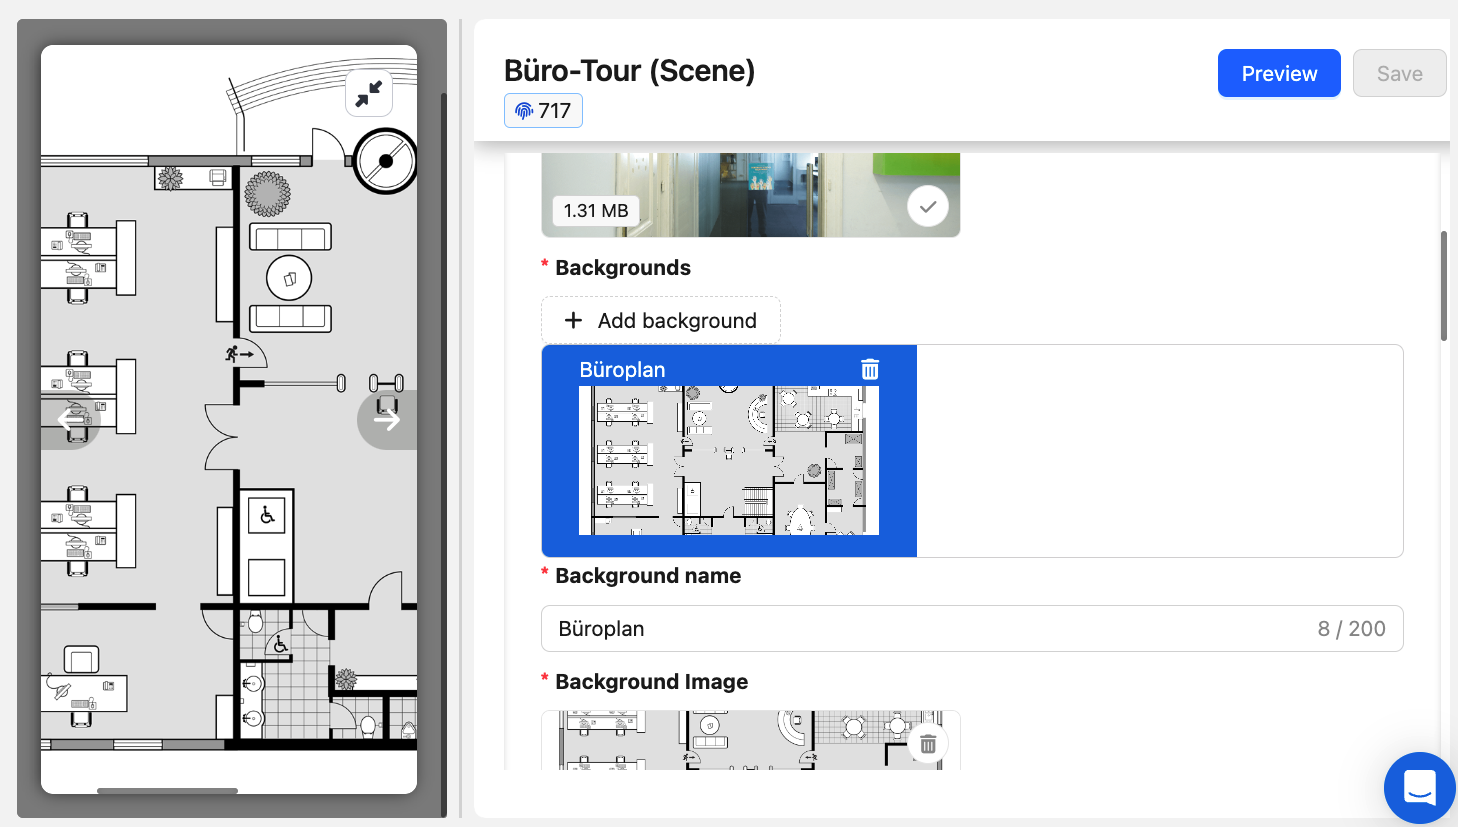
To be able to save a scene, you must add at least one background. To do this, click on the button of the same name and new input fields for the background will appear.
Each background must also have a unique name and an image as background. For a background to be permitted for a scene, the image must be in landscape format. A background image for a scene must be at least 600px high so that it can be displayed on smartphones in full screen mode without any loss of quality.
A background can also have an audio file stored in it. If you add an audio file, it is displayed at the top left of the respective background.
If you have added a background, you can use the position slider to specify which image section should be displayed first when the scene is opened.
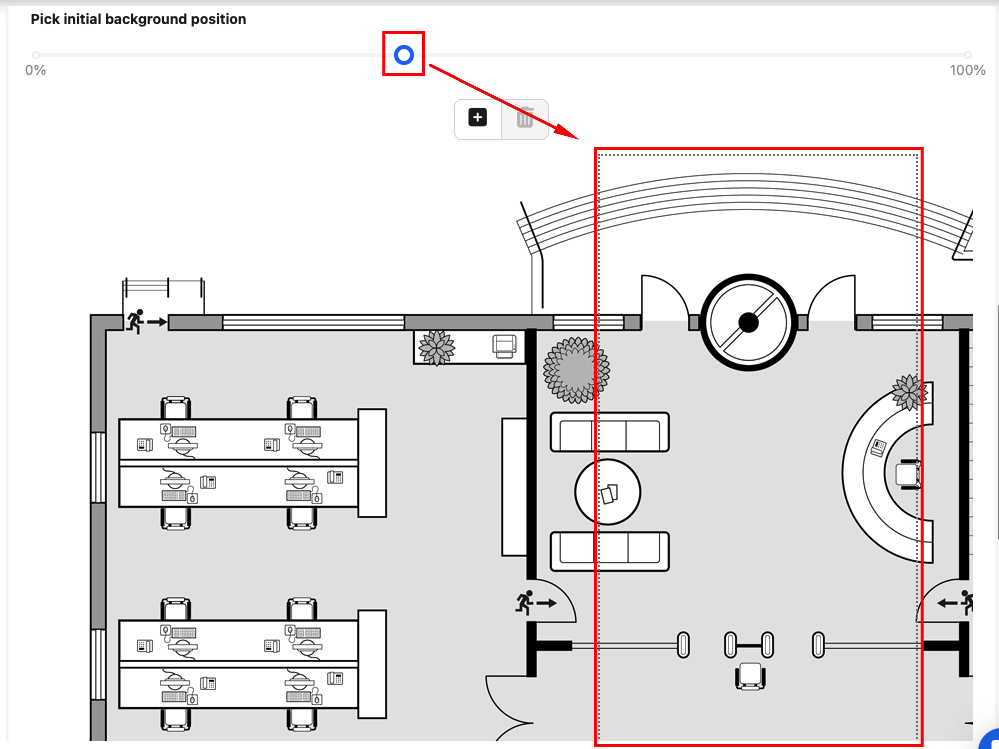
The start area of the scene is displayed in the preview below with a dashed rectangle and shows you the width of the smallest cell phone display that is currently supported.
Hotspots are elements on a scene that either open an info box or open another background of the scene. To add a hotspot, you will find a button with a plus symbol above the added background image.
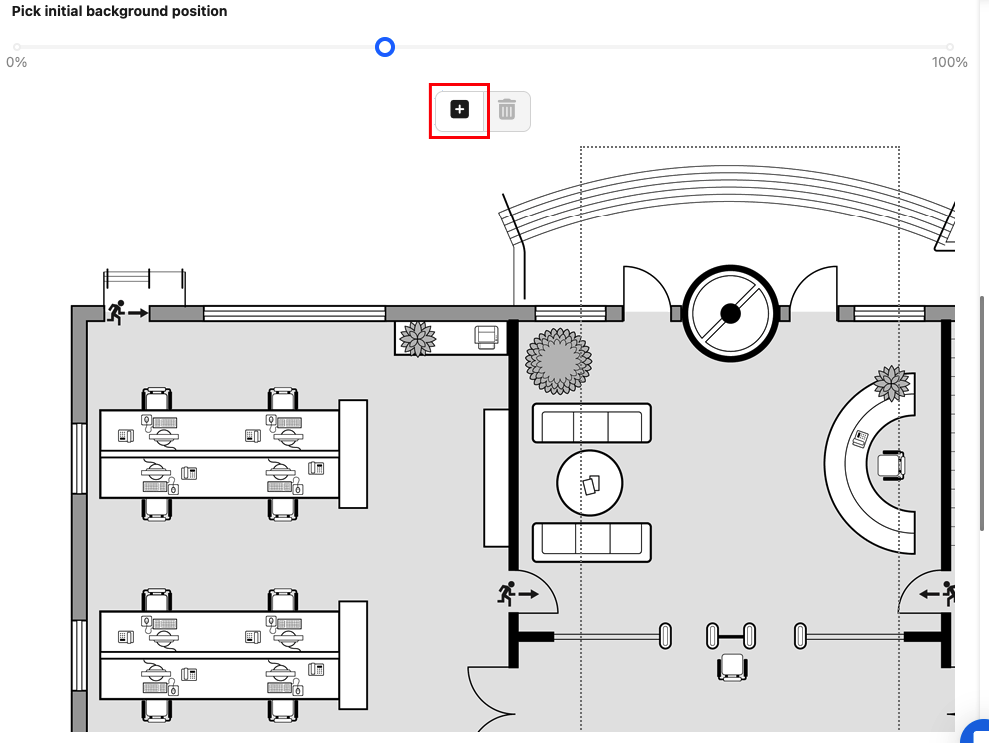
After clicking, a hotspot is added in the middle of the current scene section. You can now move the hotspot using drag and drop. The gray area around the hotspot shows you the interactive area that users must click on to open the hotspot. You can enlarge or reduce this area at the corners.
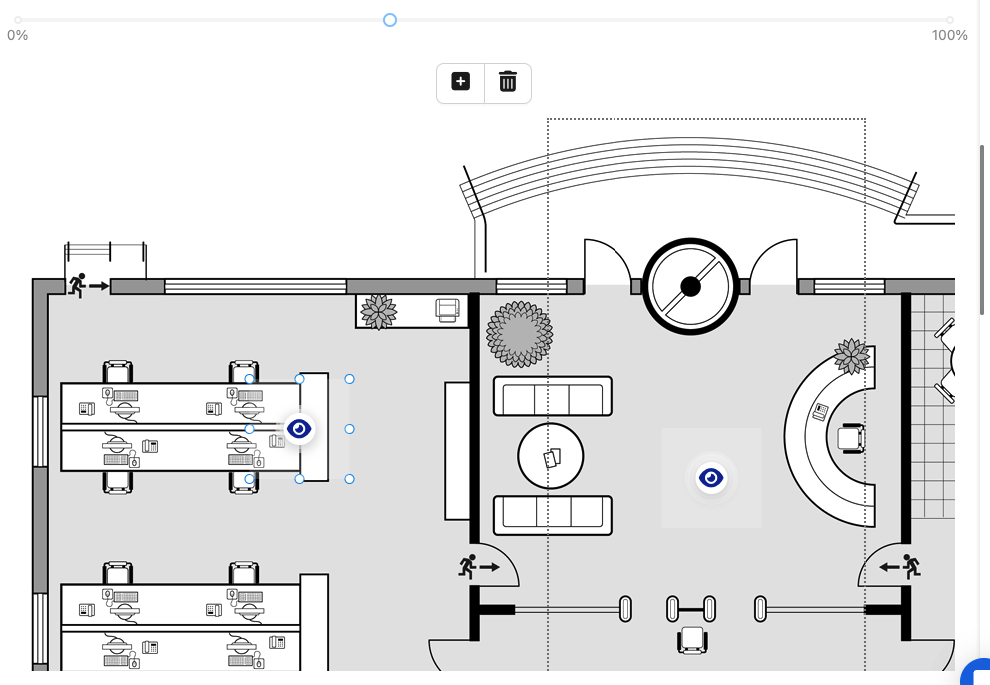
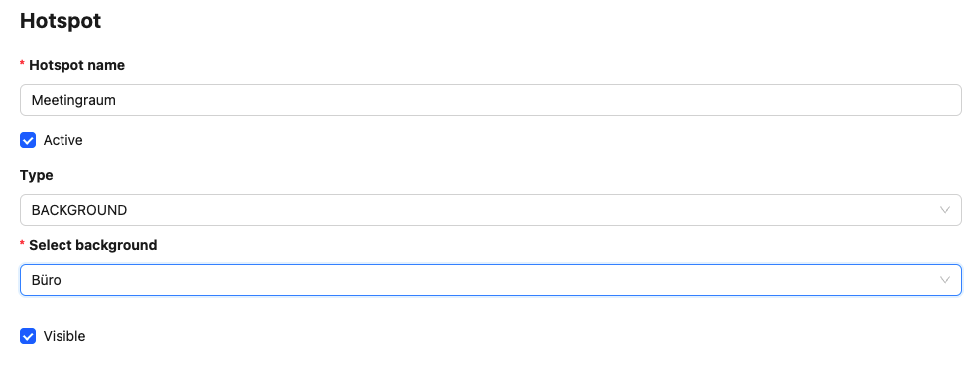
Scroll down to edit the hotspot. Assign a name for the hotspot. Each hotspot can also be marked as inactive and can be made active and therefore visible later if required.
For the type of hotspot you have the choice between:
Infobox: The hotspot opens an infobox with text, image and/or audio.
Background: The hotspot opens another background of the scene.
Note: The "Background" type can only be selected if the scene contains several backgrounds. To do this, click on "Add background", upload a suitable image and save the scene.
If you have selected the type Infobox for the hotspot, you can now describe the hotspot in more detail.
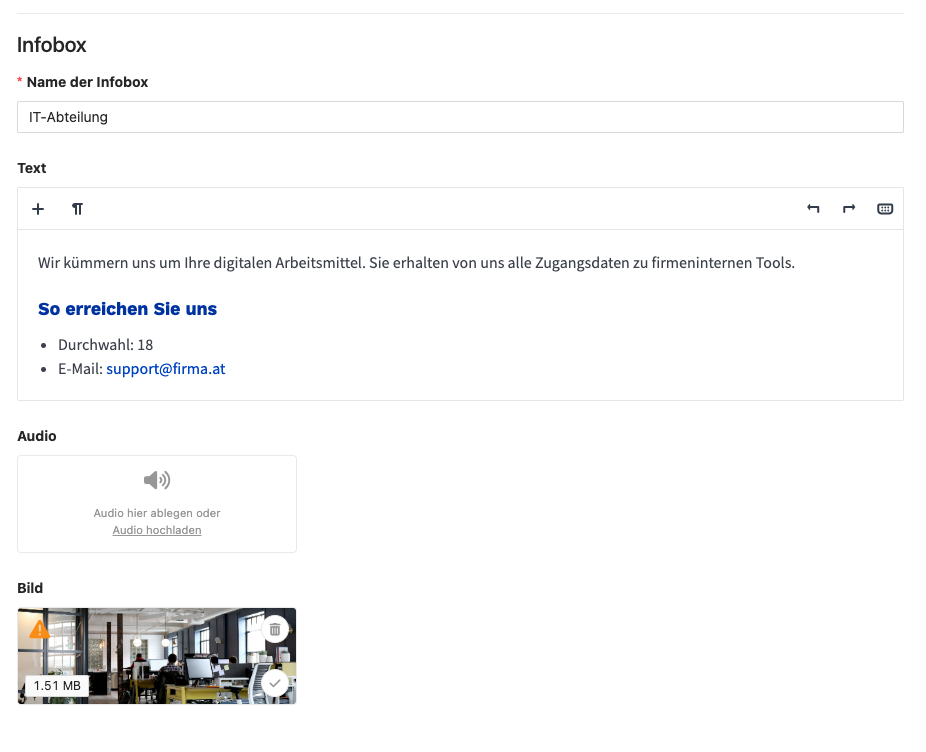
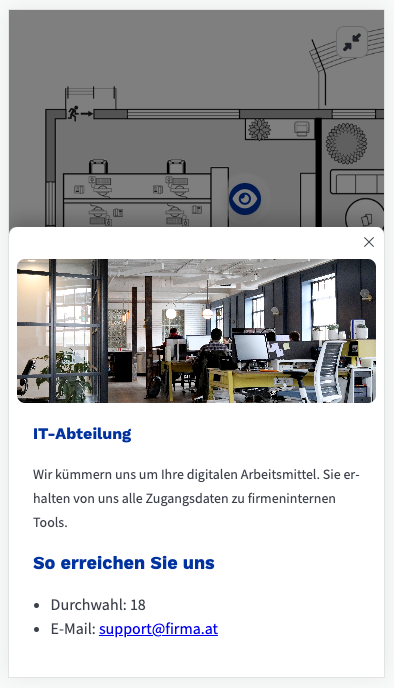
The name of the info box is also the title and is displayed as a heading. You can add any formatted text using the text field. You also have the option of uploading an audio file and an image.
In the preview view in the map editor, you can open the scene and activate hotspots.
A scene can contain several backgrounds. To create multiple backgrounds, click on Add background.
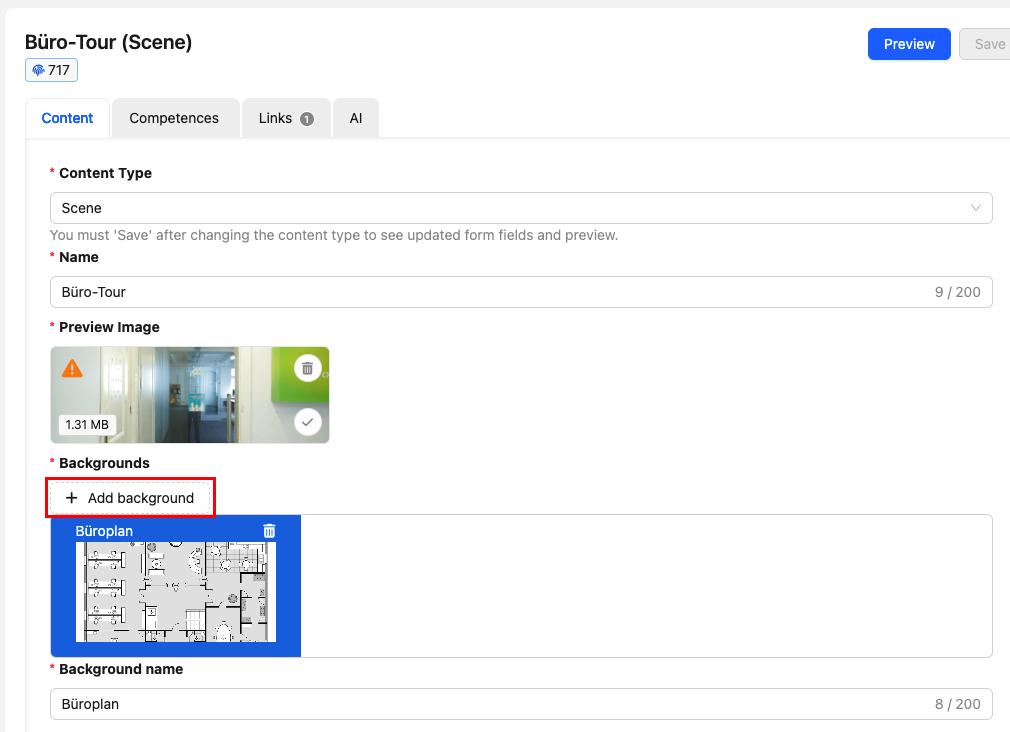
To create a hotspot that refers to this background, first save the scene. To switch between the different backgrounds to place hotspots, click on the different backgrounds in the background list.
If you have created a hotspot, you can select which of the created backgrounds you want to open for the Background type.
This allows you to open a more detailed image for certain elements in the first background or, for example, create a tour of the office through several rooms.
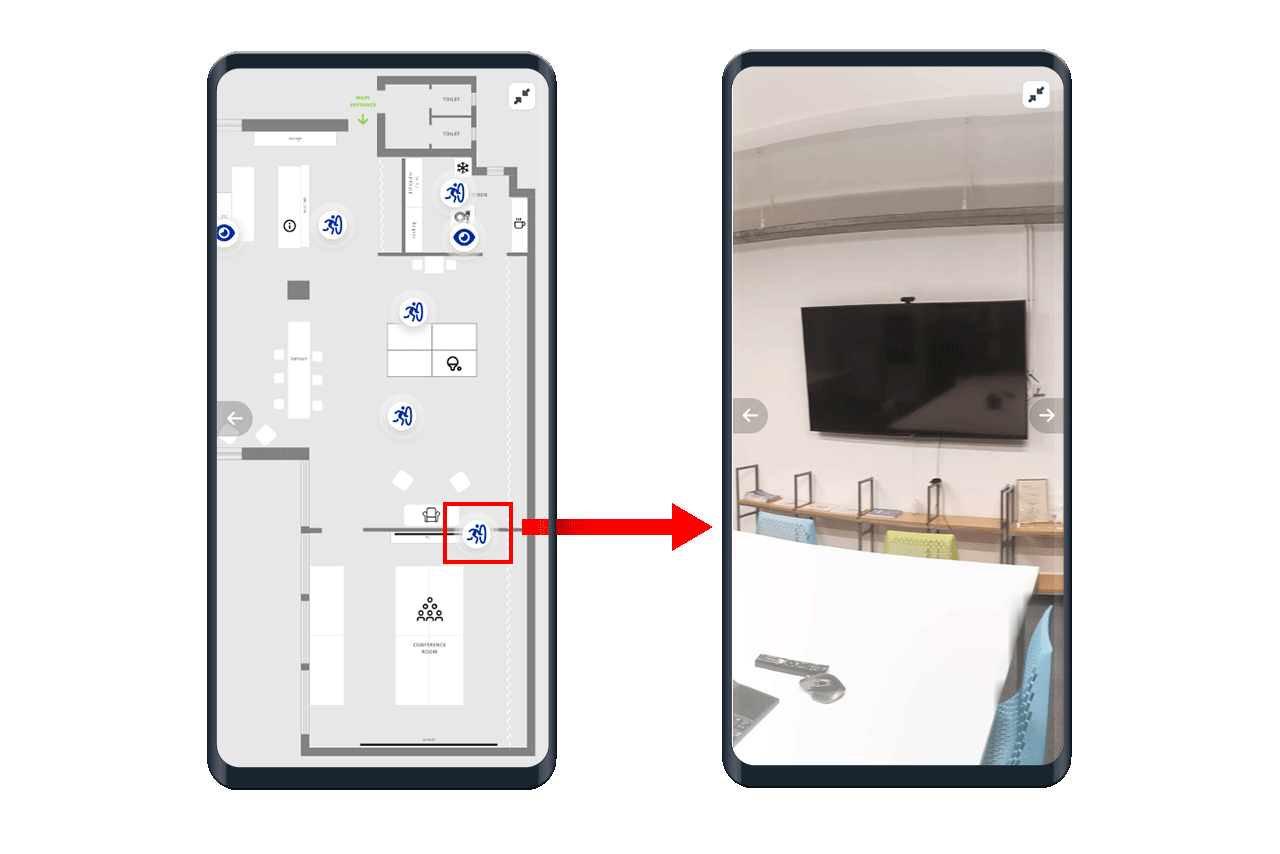
Note: If you link to a background, users can only close the scene completely to get back. Remember to create a background hotspot back to the first background on the linked background.