* We recommend using an email address that can be accessed by multiple people in your company, such as your support email or your info email.
If your company email address is already a Gmail account, proceed directly to step 2.
Otherwise, create a new account here.
Enter your company email address in the "Your email address" field and fill out the form.
Google sends important messages, actions, or decisions regarding your app to this email address. Therefore, please check this inbox regularly.
4. Complete the verification process.
You will receive a code by email or phone to verify your account. For additional help, see Google-Account-Support.
A D-U-N-S number, which stands for Data Universal Numbering System, is a unique nine-digit identification number assigned to a business entity by Dun & Bradstreet (D&B), a prominent business data and analytics company. The purpose of a D-U-N-S number is to provide a standardized and globally recognized identifier for businesses, allowing them to be easily identified and tracked in various databases and business transactions.
You can apply for your D-U-N-S-number for free - if your company is not from Germany, Austria or Switzerland look ukönnen Sie Ihre eigene D-U-N-S-Nummer kostenlos beantragen:
The process to receive your D-U-N-S number can take up to 30 days, so take this step as soon as possible. (However, experience shows that it is usually much faster).
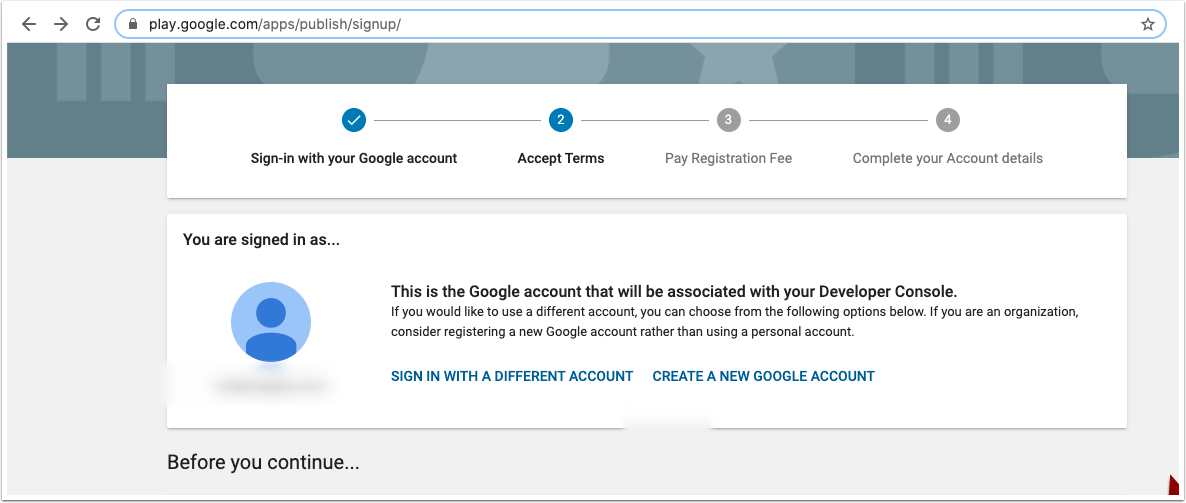
Once your new Google account is verified, open Google Play Console, to complete the registration..
a. Sign in with your Google account.
b. Read and agree to the Developer Distribution Agreement. Click Continue to Payment.
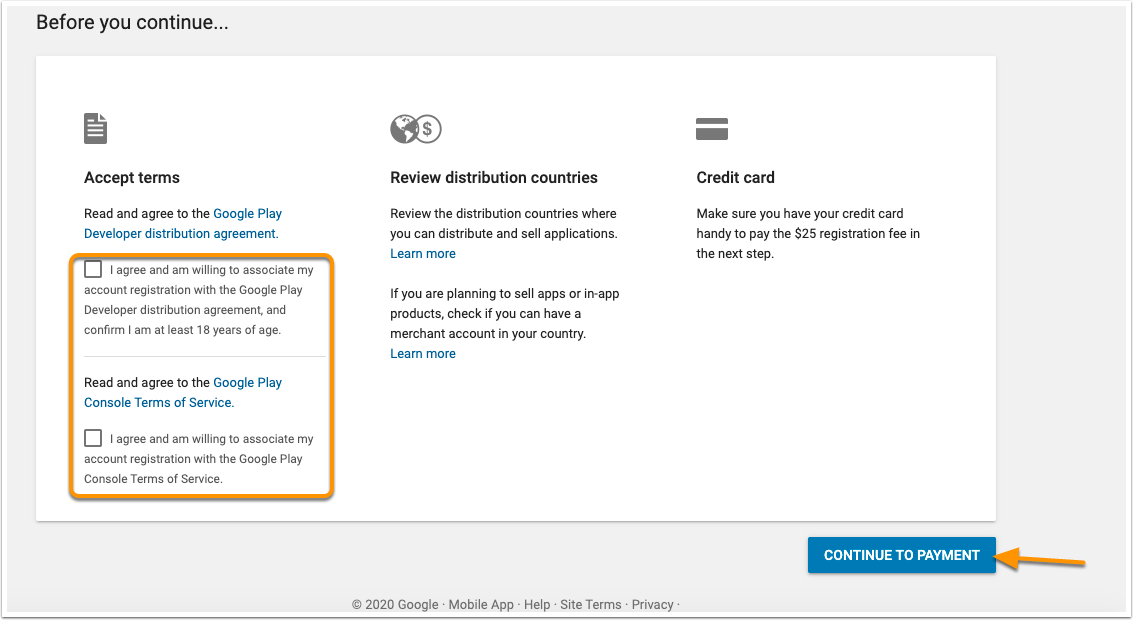
c. Pay the one-time $25 USD registration fee for your account using your credit card.
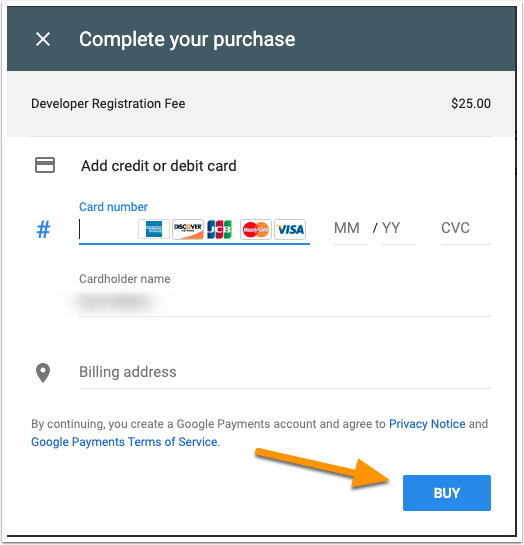
d. Complete your account details.
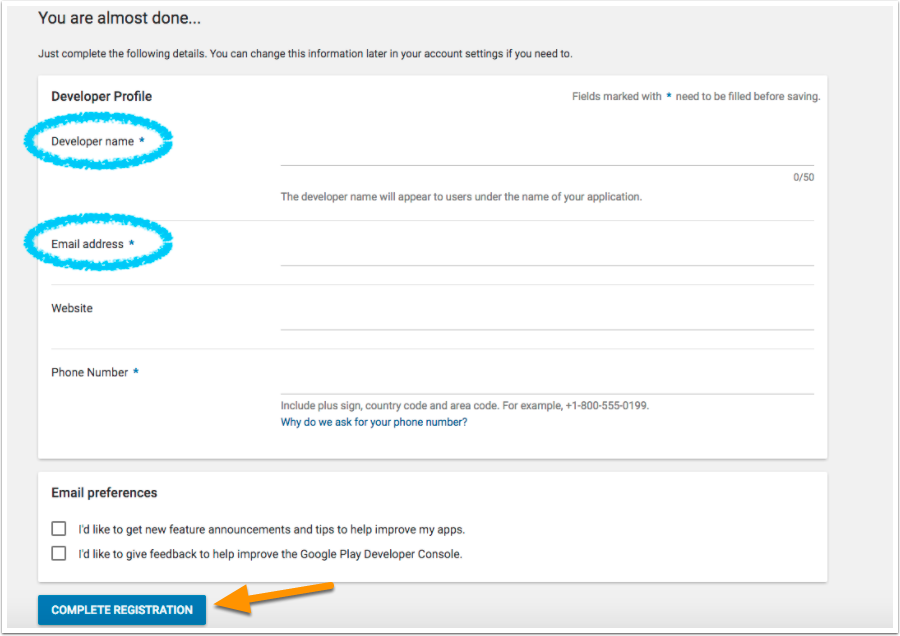
Developer name, email address and website are displayed on the "Google Play Store" page of your app.
Developer Name
Enter your company name. This will be displayed as the name of the publisher.
email address
Enter your support email address so that your app users can reach you.
Website
Enter your company website.
Phone number
It should be possible for Google and also for app users to reach you at this phone number if there are problems with your app. This number is publicly displayed in the Store account.
Once your registration is verified, you will receive an email to the email address associated with your Google Play Console. This usually happens within half an hour, but can take up to 48 hours.
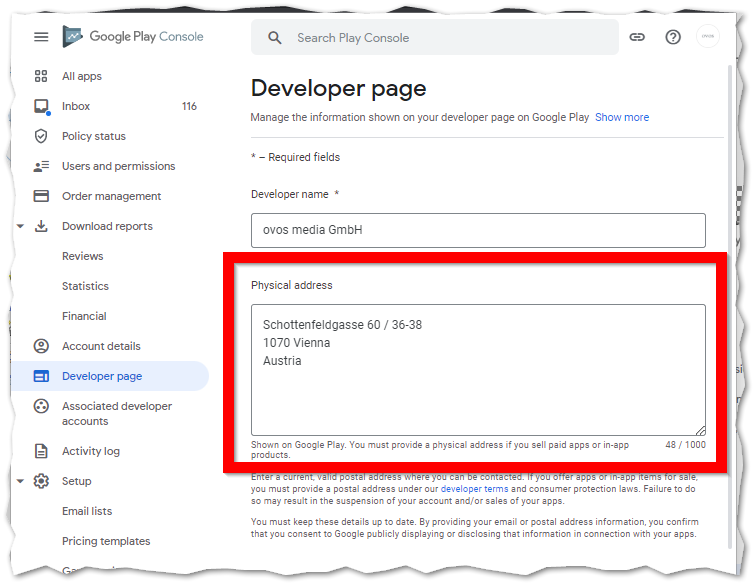
Once you have completed the registration of your Google Play Developer Account, please add the address of your company. This is important for Google to approve the app for the Google Play Store.
Please add your company's address on the page that opens afterwards (Developer account → Account details) and click the SAVE button in the upper right corner.
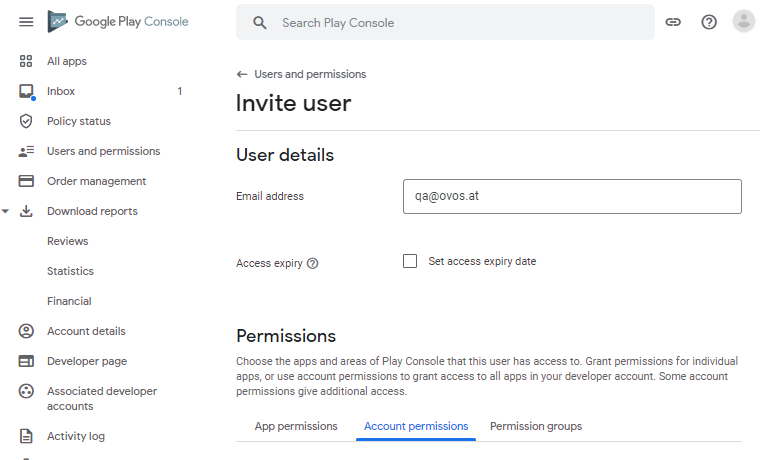
The ovos media app team will ensure that your Android app is published in the Google Play Store. In order for our team to perform the tasks required for this, you need to invite ovos to act as "release manager".
In your Google Play Console go to Settings → Users and Permissions → Invite New User. This field is hidden under the three dots on the right next to the dropdown “Manage users”
On the "Add new user" page, enter the following information and finally click Add user.
email address: [email protected]
Access expiration date: Never
Under “Account Permissions”, select everything except Administrator (all permissions) and the two items at Financials.
This role is necessary to create and update your app.
Permissions: Worldwide
Once the invitation is sent, our app team will receive an email to accept the invitation.
ovos uses an automated app service to regularly update your apps. To do this we need access to your Google Play Developer API. This step is quite complex - Google made sure it was even more complicated with an update in October 2023:
Please note that you must be logged into the Google Cloud Console with the same account as in the Google Play Console!
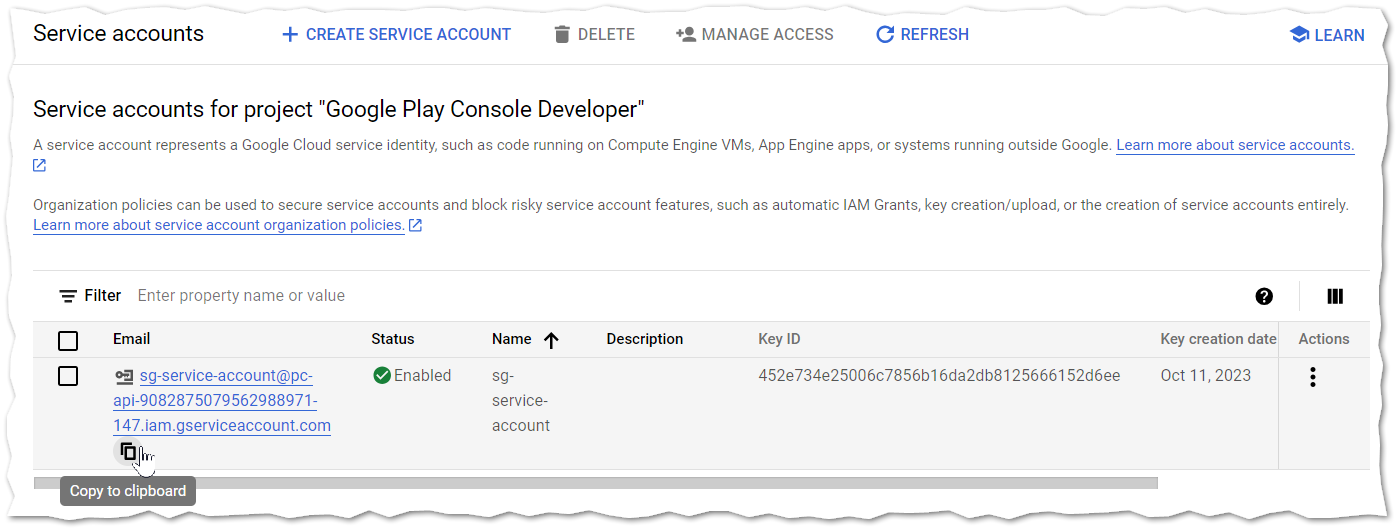
Copy the email address and go to step 3.
If nothing appears here, go on to step 2b/2.
The first step is to create a new project in the Google Cloud Console. This link will take you directly to the project creation.
Please note that you must be logged into the Google Cloud Console with the same account as in the Google Play Console!
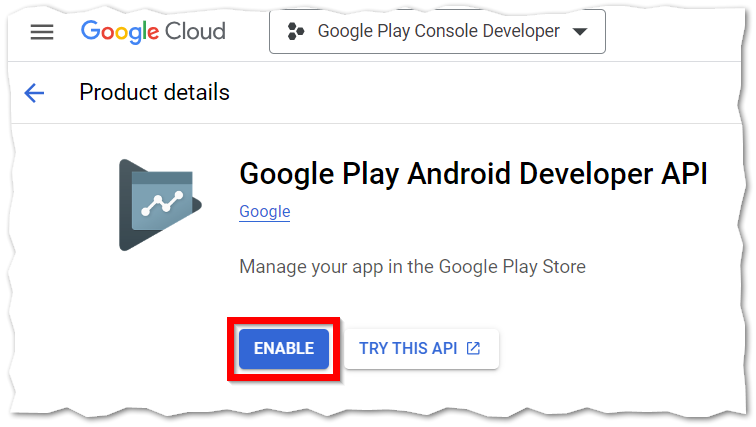
You must then activate the API. To do this, please call up this link and click on "Enable".
The next step is to create a service account. Follow this link and click on "Create service account" in the upper bar.

Enter "sg-service-account" as the name of the service account. This automatically fills the field "Service account ID".
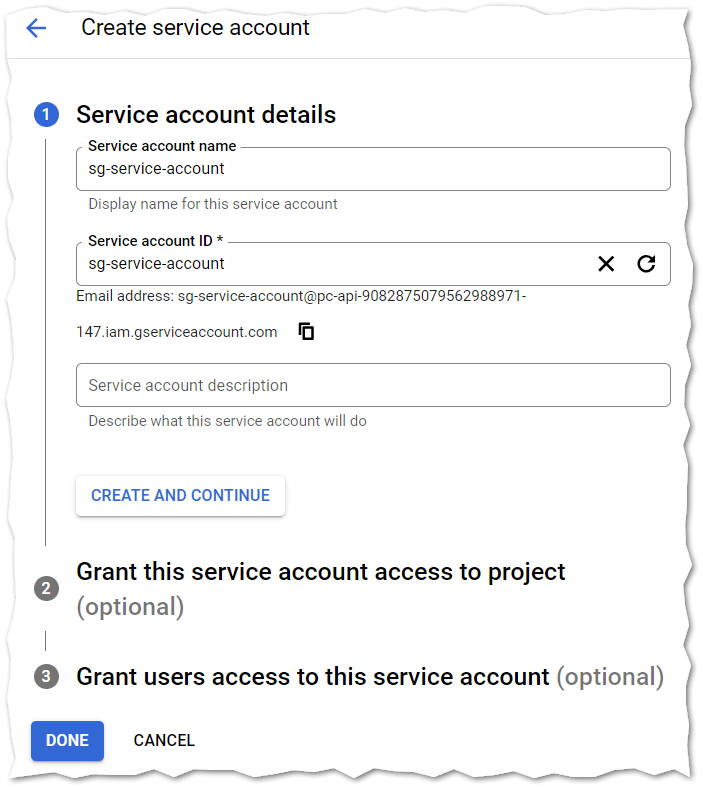
Click on Create and Continue.
In the second item, please select "Owner".
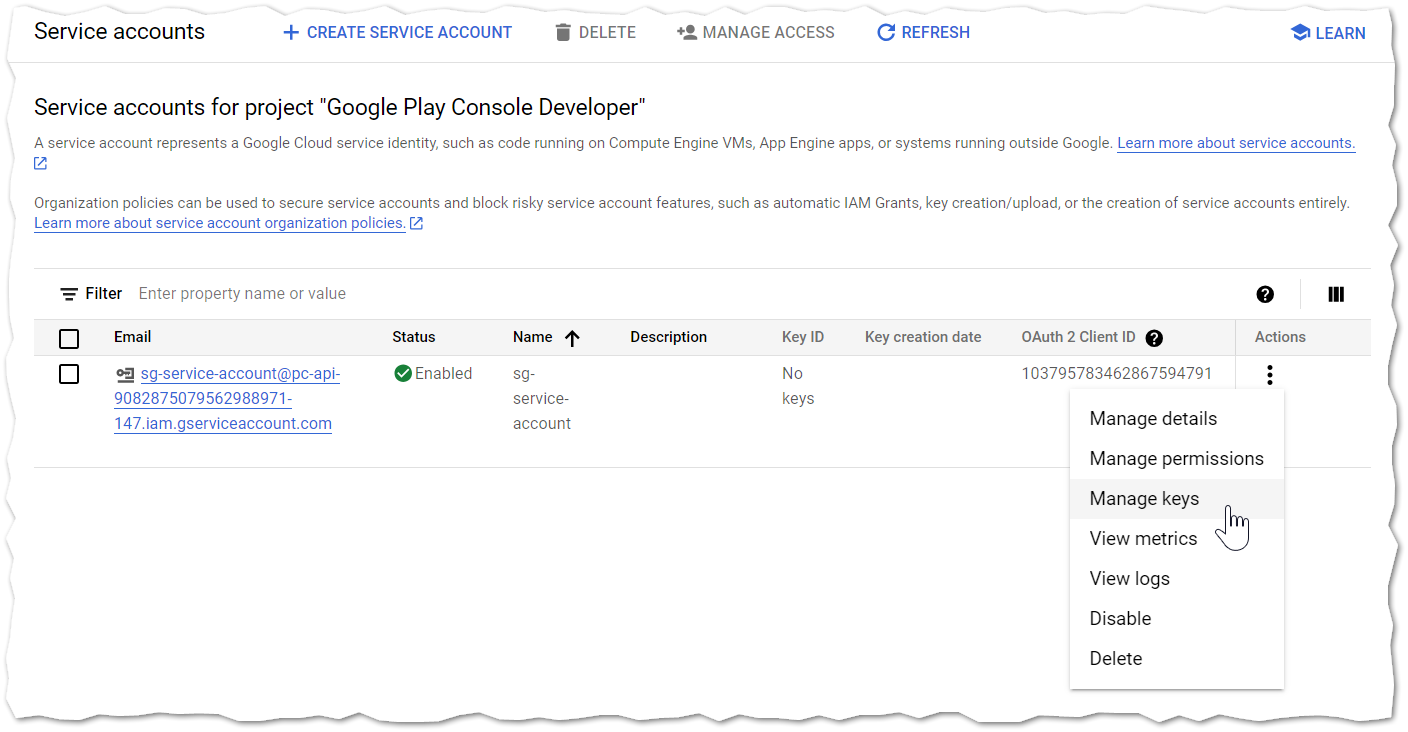
Then, in your service account overview, select the service account you just created and click on "Manage keys" in the three dots on the far right.
Then click on the button "Add key" and on "Create new key".
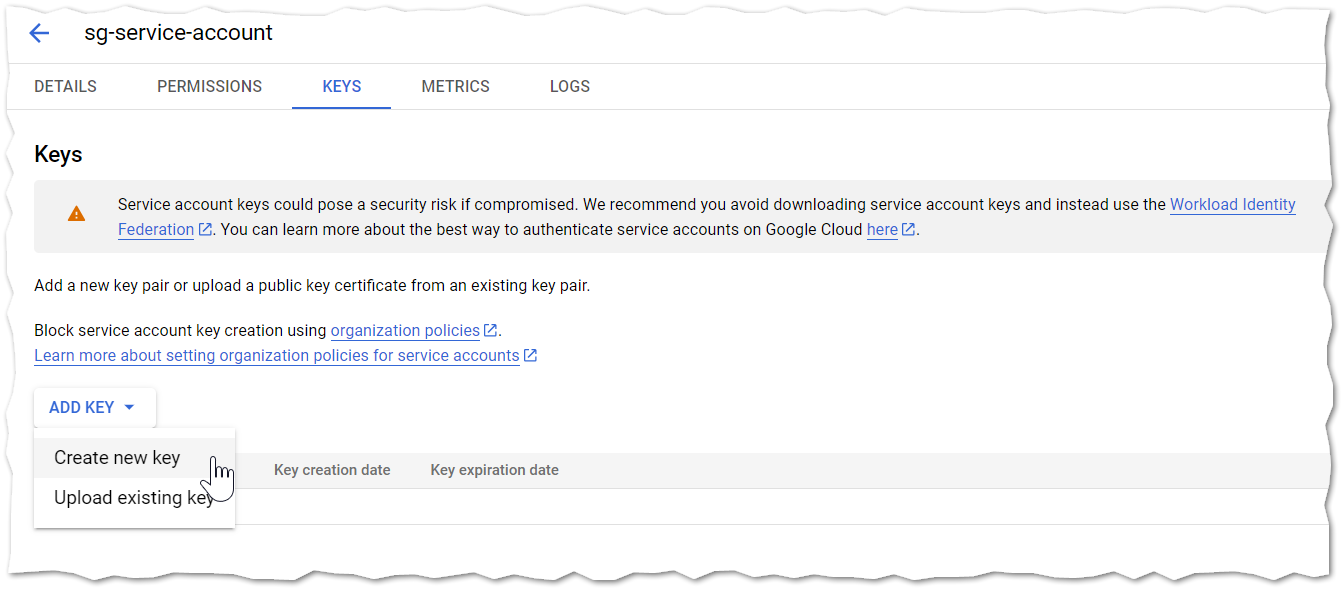
Select "JSON" as the key type and click on "Create". The Private Key has been created and will be downloaded automatically.
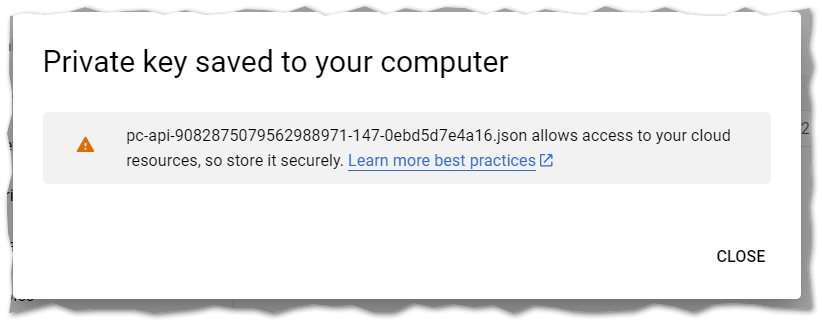
Go back to the service account overview again - your service account has an email address that starts like this "sg-service-account@pc-api...[number string]....iam.gserviceaccount.com". Please copy this email address.
Now switch back to the Google Play Console and open the "Users and permissions" area as in step 1.
Click on "Invite new users", add the email address and assign the "Administrator" permission in the "Permissions" area in the "Account permissions" tab.
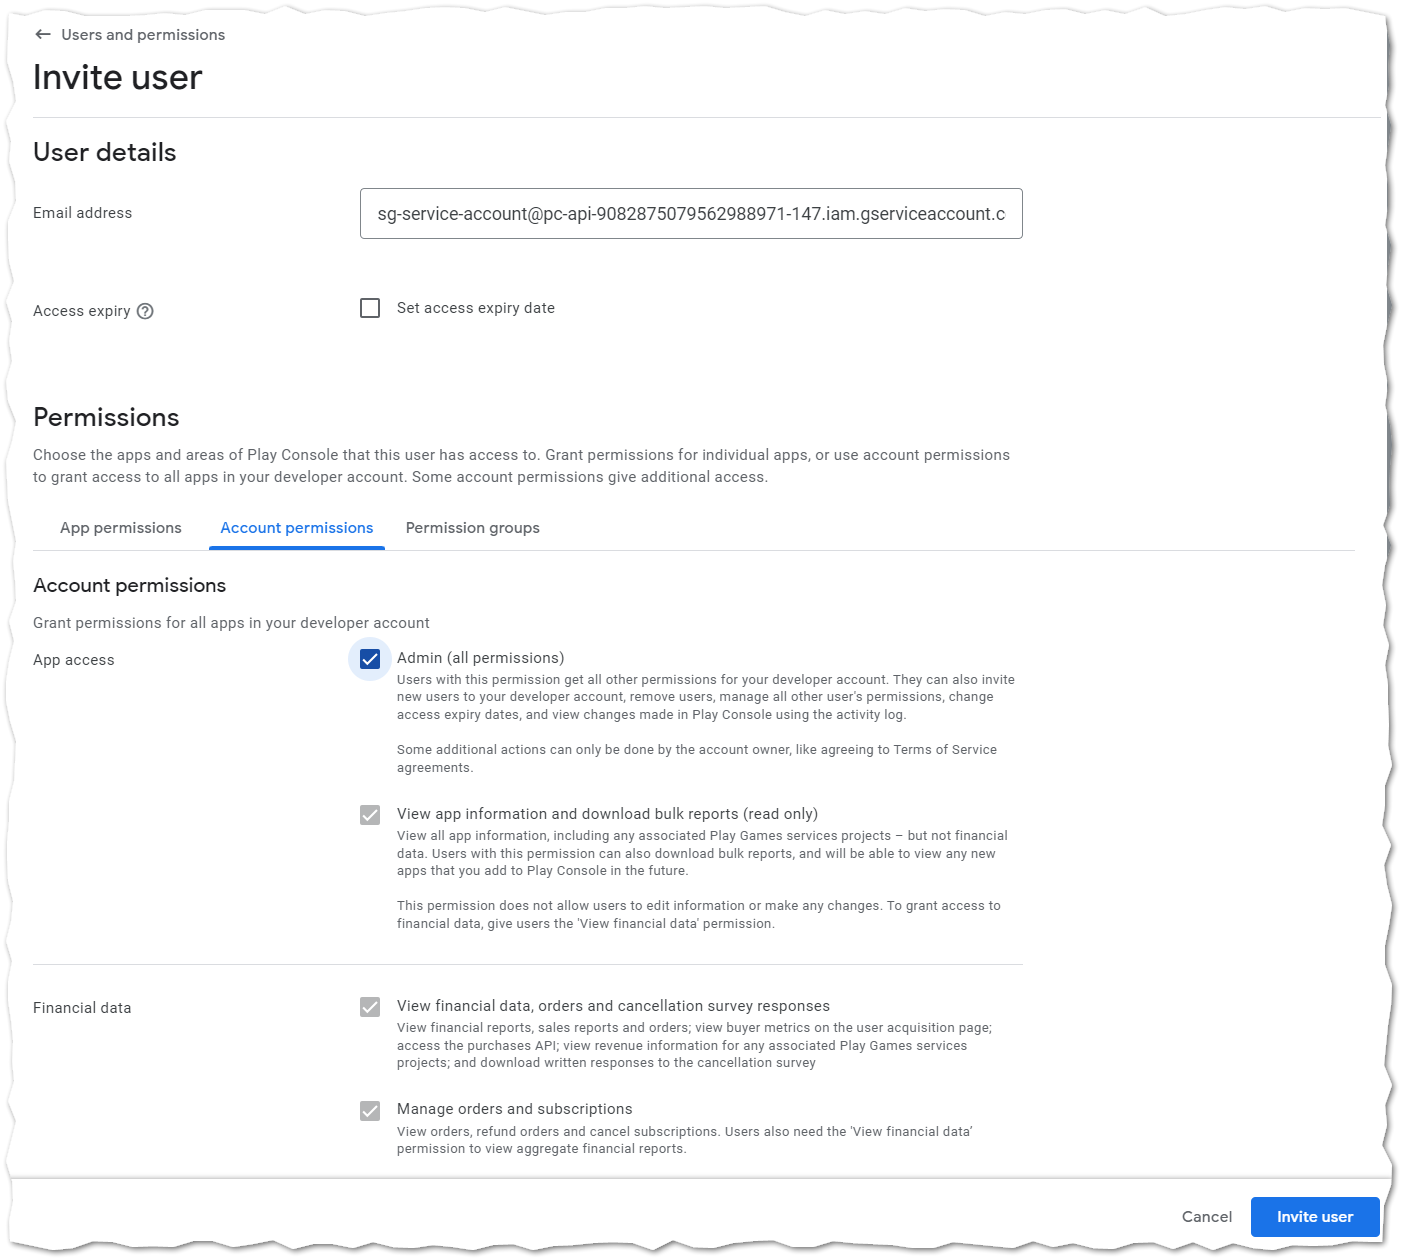
Then click on Invite user.
If your company's security regulations do not allow it, you can also assign these admin rights exclusively in the "App permissions" tab for your app. (For information: We have not yet been able to test this, but assume that this should also work. We know from the other way (account permissions) that it works).
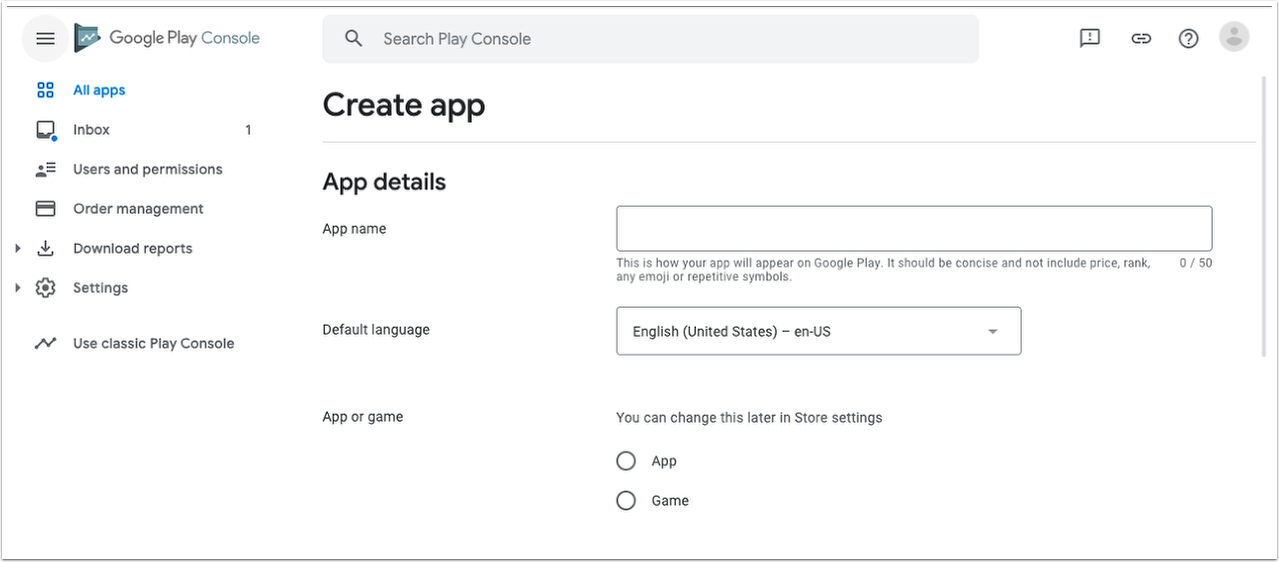
Go back to the Play Console once again - and click the "Create App" button in the "All Apps" menu item:
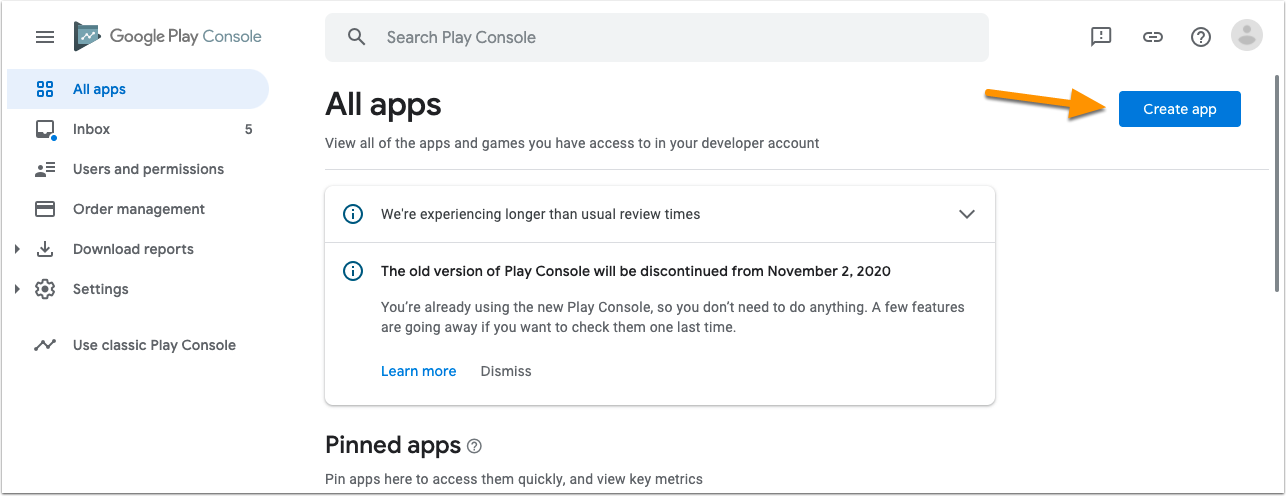
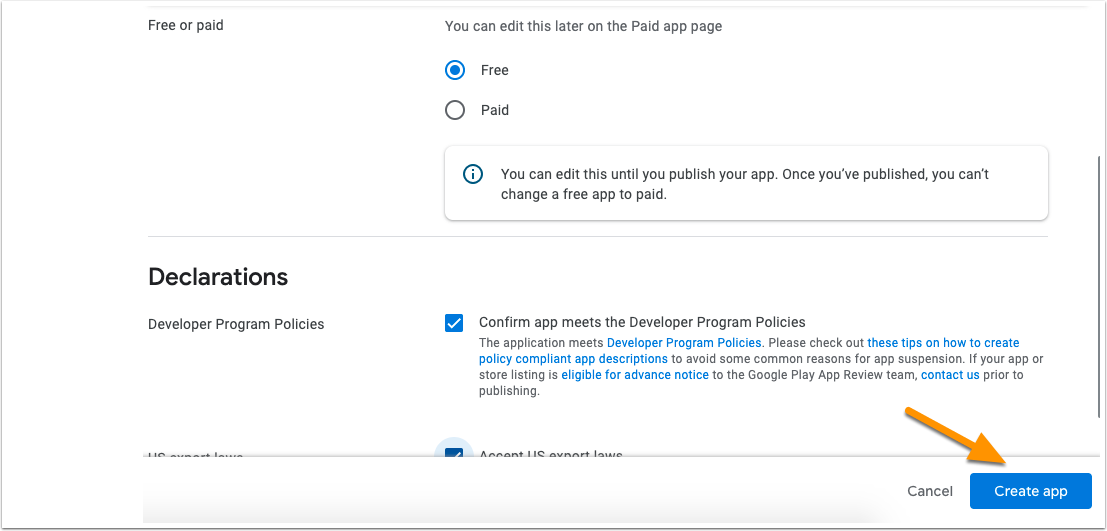
Then fill in all the items - app name and everything else can be changed afterwards. And also tick all the items. At the end click again on "Create app" at the bottom.